
You've got a new electric vehicle sitting in the garage, and the first-night experiment didn't go well. You plugged it into the available outlet, went to bed, and woke up with the battery still well below where you expected. Before buying a wall-mounted charger, there's one question that matters more than brand, app features, or charging speed: Can your home's electrical service support Level 2 charging without a panel upgrade?
That decision controls the project's wiring, permit path, cost, and schedule. This guide approaches an electric vehicle charging station home install the way I'd advise a Palm Beach County homeowner at the kitchen table, starting with the panel, then moving through charger selection, site planning, permits, installation, inspection, and ongoing maintenance.
Table of Contents
- What Home EV Charging Looks Like for a Palm Beach Homeowner
- Level 1 vs Level 2 Charging and Which One Makes Sense
- Site Assessment You Can Run Before Calling an Electrician
- Electrical Requirements Permits and Inspections in Palm Beach County
- Realistic 2026 Costs and Timelines Including Panel Upgrades
- Installation Day From Mounting the Unit to Final Inspection
- Troubleshooting Maintenance and When to Call a Licensed Electrician
What Home EV Charging Looks Like for a Palm Beach Homeowner
A Tesla Model Y or Rivian R1S parked in a West Palm Beach garage creates a familiar problem. The owner uses a dryer outlet overnight, expecting the battery to be ready by morning, but the vehicle is still sitting around the same partial charge. The outlet may be functioning correctly. The issue is that a standard household connection often can't replenish a large battery quickly enough for the owner's daily routine.
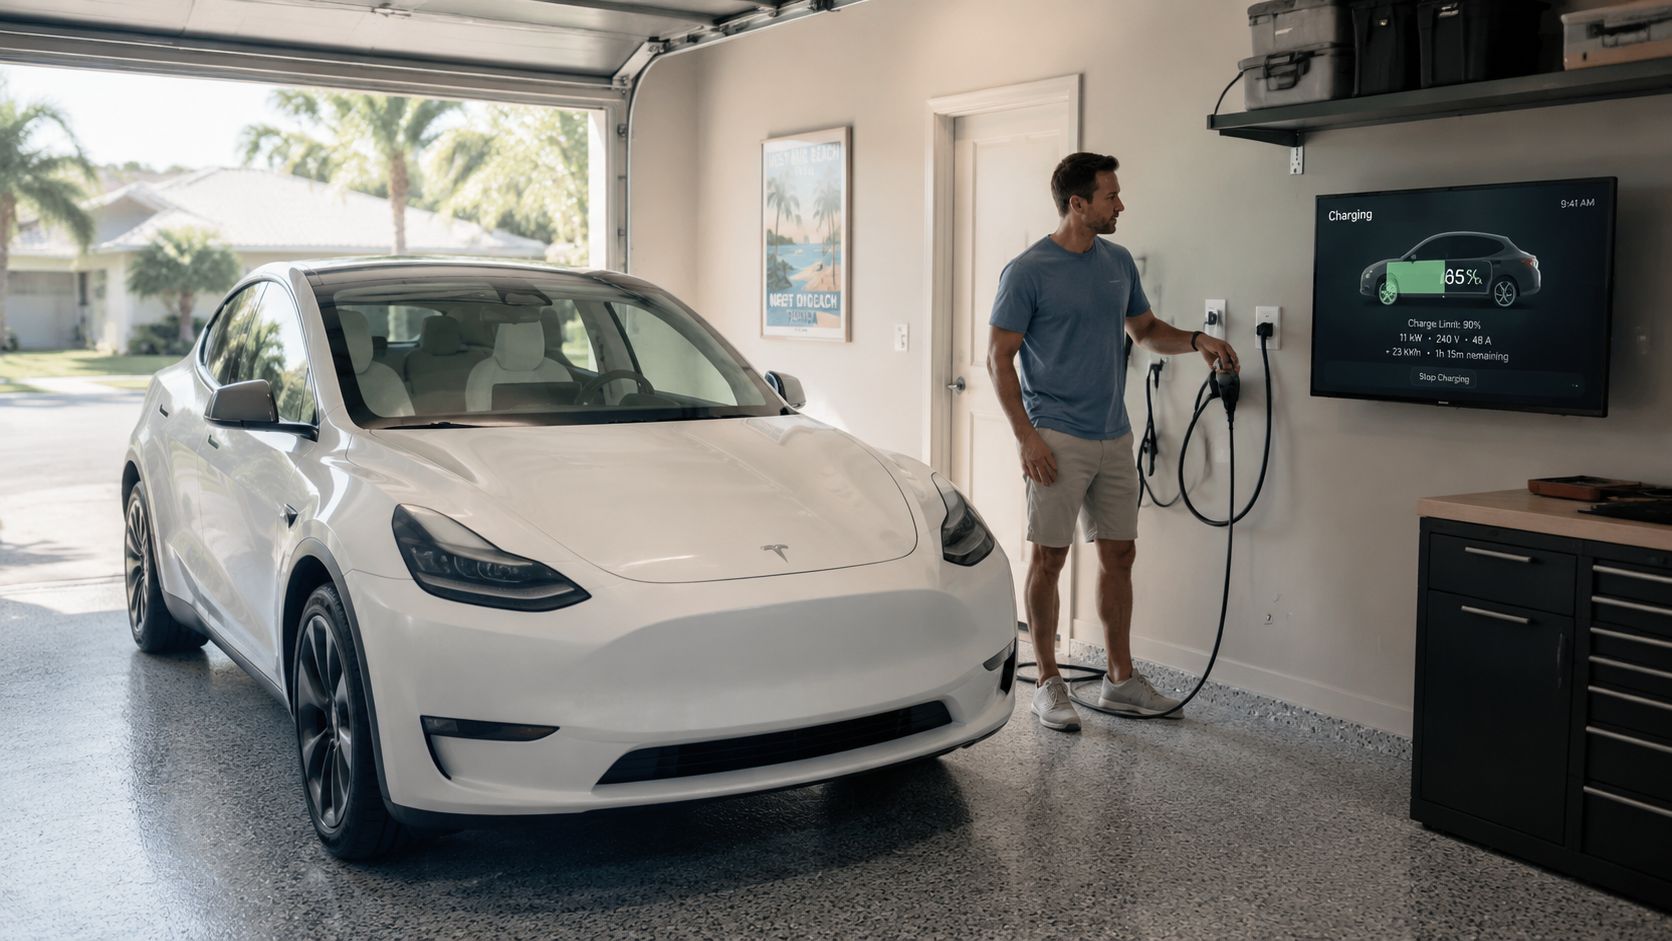
The panel decides the project
Many South Florida homes built in the 1990s and 2000s have 150-amp or 200-amp electrical panels, but the main rating alone doesn't tell you whether an EV charger will fit safely. The panel may lack open breaker space, or the existing household loads may already consume most of the service capacity. A licensed electrician needs to verify both the physical breaker arrangement and the calculated electrical load.
The International Energy Agency estimated more than 43 million private light-duty vehicle charging points worldwide in 2025, supporting an electric light-duty vehicle fleet of about 76 million, and identified home charging as the most popular way for EV owners to charge. The same source estimated 27 million home chargers in operation globally in 2023 and projected that the stock could exceed 270 million by 2035 under current-policy scenarios. Those figures show why a residential charger should be treated as a permanent electrical installation, not a convenience outlet. The IEA-related charging overview also helps explain why panel capacity, permitting, and residential wiring are central to EV readiness.
Location matters in coastal air
Put the charger where the vehicle naturally parks, but don't ignore the wall environment. Coastal humidity, salt air, direct afternoon sun, irrigation spray, and garage ventilation can affect equipment placement and enclosure life. A shaded interior garage wall near the electrical panel is usually preferable to a sun-baked exterior wall, provided the cable reaches the charge port without crossing a walking path or sitting under a garage door.
The right starting point isn't “Which charger should I buy?” It's “What can this home safely support?” Once that answer is documented, the rest of the installation becomes much more predictable.
Level 1 vs Level 2 Charging and Which One Makes Sense
Level 1 charging uses a 120-volt household outlet. Level 2 uses a 240-volt dedicated circuit and requires the electrical work discussed throughout this guide. The difference isn't cosmetic. Level 2 gives a homeowner a practical overnight charging routine, while Level 1 can leave a larger vehicle recovering from yesterday's driving long after the car is parked.
| Factor | Level 1 (120V) | Level 2 (240V) |
|---|---|---|
| Circuit type | Standard household outlet | Dedicated branch circuit |
| Typical charging use | Light daily driving or plug-in hybrid use | Regular battery-electric vehicle charging |
| Approximate range added | Roughly 3 to 5 miles per hour | A 48-amp unit can add roughly 30 to 40 miles per hour, depending on the vehicle |
| Installation work | Usually uses an existing outlet | Requires load calculation, wiring, breaker, mounting, and permitting |
| Best fit | Temporary setup or modest charging needs | Long-term ownership and dependable overnight charging |
A Palm Beach driver covering 25 to 40 miles a day can usually replace that daily driving comfortably overnight with Level 2. The same routine is borderline on Level 1, particularly with larger battery vehicles such as an electric pickup or large SUV. Range added depends on vehicle efficiency, battery condition, temperature, and the vehicle's onboard charging limit, so don't treat the mileage figures as a promise for every model.
My recommendation
For a homeowner planning to keep a battery-electric vehicle for more than a year, Level 2 should be the default. It gives you flexibility when an unplanned trip, heavy air-conditioning day, or weekend drive uses more energy than usual.
Level 1 still has a place. It makes sense for a plug-in hybrid, a vehicle driven very little, a rental situation, or a temporary arrangement while you decide whether a permanent installation is justified. It also avoids installation costs because it uses an existing outlet. But if you're already frustrated by slow recovery, buying another portable cable won't solve the underlying limitation.
Site Assessment You Can Run Before Calling an Electrician
You can gather useful information before an electrician arrives. This won't replace the required load calculation, but it can prevent a vague service call and help the electrician prepare an accurate proposal.
Start at the main panel
Photograph the panel directory. Open only the panel door, not the inner dead front, and photograph the breaker labels. The electrician can identify whether the panel appears to have space for a two-pole breaker and whether major 240-volt loads are already present.
Record the main breaker rating. Look for the large main breaker marked 100A, 150A, or 200A. Don't assume a larger number guarantees spare capacity. A home with electric water heating, air conditioning, pool equipment, electric cooking, and other substantial loads may still need a service evaluation.
Don't rearrange breakers yourself. An empty-looking position may not be usable, and moving circuits can create a dangerous condition. Take pictures and leave the panel untouched.
Walk the route to the vehicle
Measure the practical cable route from the panel to the preferred charger wall. Straight-line distance isn't enough. Conduit may need to follow the garage wall, cross framing, pass around a door, or enter a weather-exposed area. Longer runs generally add labor and material, while a parking space near the panel usually keeps the installation simpler.
Check the wall for studs or masonry, plumbing, gas lines, windows, shelving, and vehicle-door clearance. Avoid placing equipment where direct afternoon sun, salt air, or irrigation spray will constantly attack the enclosure. The connector should rest in a secure holster, and the cable shouldn't lie where tires can crush it.
Look for existing 240-volt equipment
Note whether a dryer outlet or another 240-volt appliance circuit sits close to the parking position. Reusing a circuit is only acceptable after an electrician confirms the circuit rating, conductor size, outlet condition, disconnecting arrangement, and whether the appliance can be removed from that load. A receptacle installed for a dryer isn't automatically suitable for continuous EV charging.
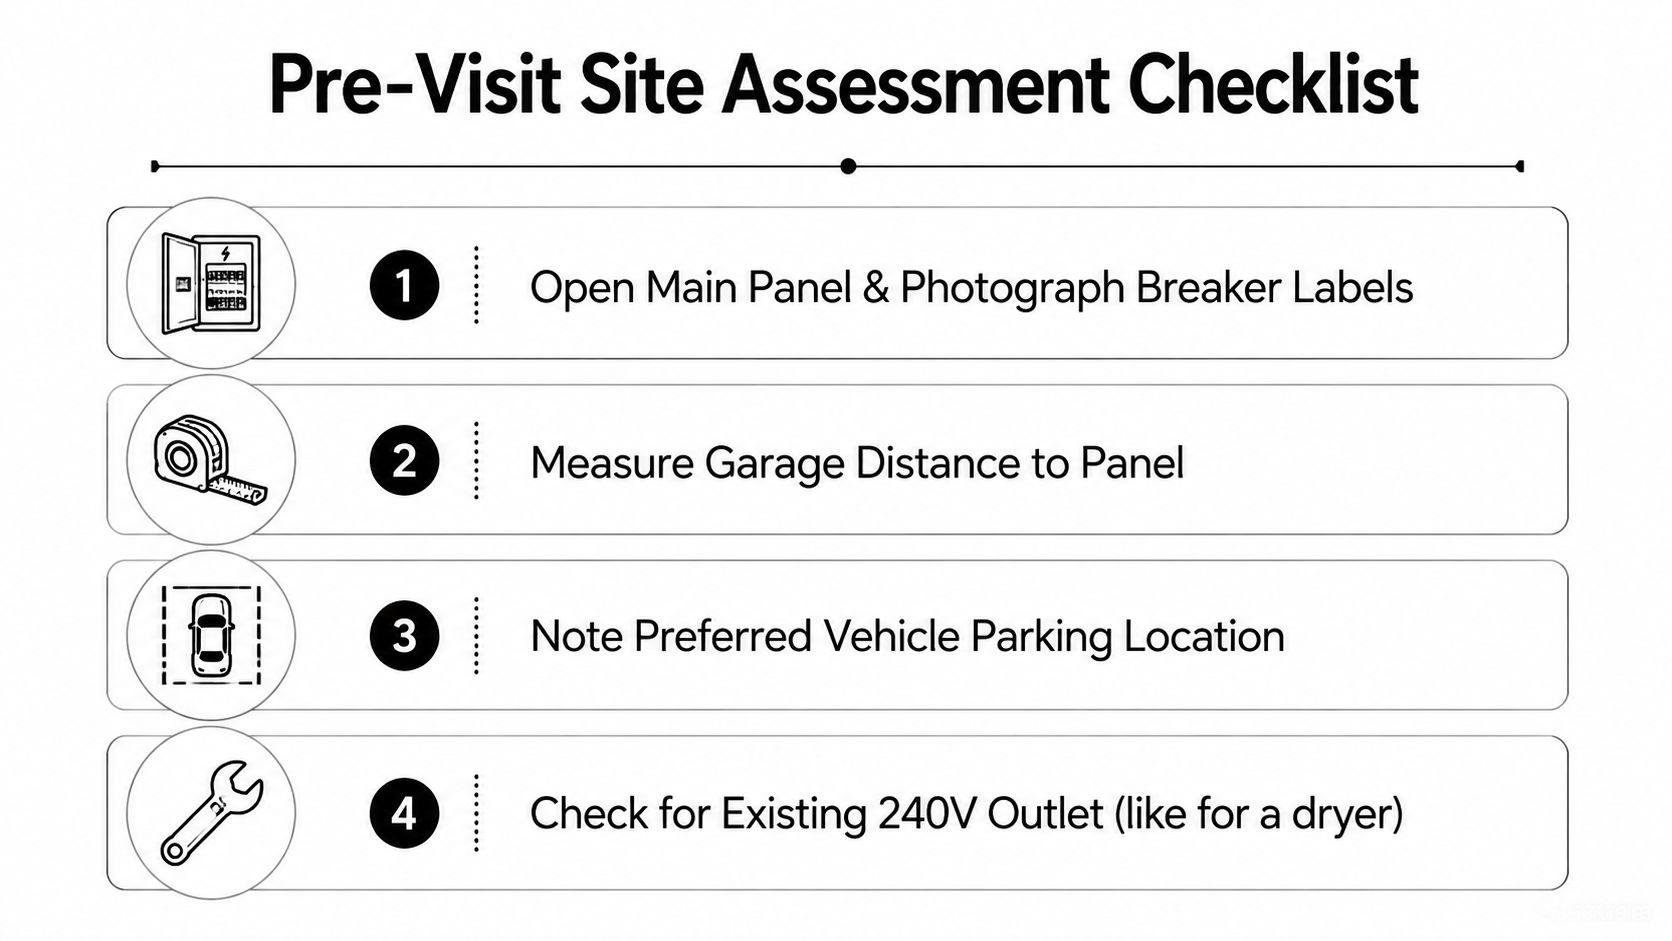
Homeowner rule: Take pictures, measurements, and notes. Let the licensed electrician make the final electrical decision.
If you need help evaluating credentials before scheduling work, use this practical guide to how to find a good electrician. The person you hire should be comfortable with residential load calculations, EVSE installations, permits, and Palm Beach inspection requirements.
Electrical Requirements Permits and Inspections in Palm Beach County
A Level 2 charger is a continuous load, so the branch circuit can't be sized like an occasional-use receptacle. Under NEC guidance, the charger's rated output is sized at 125% for circuit calculations. In practical terms, a 40-amp charger is typically paired with a 50-amp breaker, while a 48-amp charger is typically paired with a 60-amp breaker. This EV installation requirements guide outlines the same relationship and the need for a dedicated 240-volt circuit, GFCI protection, and permitting.
What the electrician calculates
The installer should verify spare panel capacity, confirm breaker-space availability, and complete an NEC Article 220 load calculation before selecting the final charger setting. The conductor and breaker must match the EVSE output and the installation method. For many residential layouts, 8 AWG copper is commonly used around 32 amps, while 6 AWG is commonly used around 48 amps, but the final conductor choice depends on insulation rating, termination temperature, conduit conditions, distance, and local code interpretation. This residential EV wiring guide explains why a NEMA 14-50 receptacle or existing appliance circuit isn't automatically adequate.
A subpanel may improve breaker organization or provide a convenient distribution point near the garage. It doesn't create more utility service capacity. If the whole service is already overloaded, adding a subpanel only moves the problem. A properly engineered load-management system may offer a safer middle path in suitable homes, but the electrician must document how it controls the combined loads.
What the permit package should contain
Expect the Palm Beach County Building Division or applicable municipal authority to require documentation such as:
- Permit application: Property and project information.
- Single-line diagram: Panel, breaker, conductor route, disconnects, and charger connection.
- Charger specification sheet: Electrical rating and installation requirements.
- Load calculation worksheet: Existing demand and proposed EV charging load.
For a homeowner who wants broader context before dealing with the permit office, this resource on understanding building permits explains the general process in approachable terms.
Inspections are part of the installation
A rough inspection may occur while wiring remains exposed, before drywall or other finishes cover it. The final inspection follows installation and commissioning. In unincorporated Palm Beach County and most municipalities, a homeowner shouldn't assume they can legally pull their own electrical permit for this work. Use a licensed electrical contractor who can submit the correct documents and coordinate inspection.
Realistic 2026 Costs and Timelines Including Panel Upgrades
The cost question has two very different answers. A straightforward charger installation on a suitable panel is one project. Correcting insufficient service capacity is another project entirely, and combining the two in one generic price range misleads homeowners.
A clean Level 2 installation on a 200-amp panel with spare breaker space typically runs $1,400 to $2,400 for labor and materials, with a quality charger unit adding $500 to $900. Permit and inspection fees can add $150 to $300. These figures are planning ranges, not guaranteed bids. The route, wall construction, charger location, equipment choice, and municipality all affect the quote.
| Scenario | Typical Cost Range | Timeline | Key Drivers |
|---|---|---|---|
| Straight charger installation | $1,400 to $2,400 for labor and materials, plus $500 to $900 for the charger and $150 to $300 for permit and inspection fees | One installation day, plus a one to two week permit window | Panel capacity, cable route, wall type, charger rating |
| Service change to 200 amps | $3,500 to $6,500 | Two to four weeks | Utility coordination, service equipment, inspections |
| Upgrade involving meter base or service entrance cable | Totals can reach $8,000 to $12,000 | Two to four weeks or longer depending on coordination | Utility requirements, service entrance condition, additional inspections |
The verified pricing guidance for EV charging projects places straightforward installs around $400 to $1,500, while a 100-amp-to-200-amp upgrade typically adds about $1,500 to $3,500 and can push the total project cost above $3,000. This panel-upgrade decision guide is useful because it separates a charger-only job from the capacity problem that drives the larger expense.
Don't approve an upgrade before the calculation
Ask for the load calculation before accepting a panel replacement. A smart splitter or load-sharing charger may reduce the need for a full service upgrade in a suitable home. That solution must be engineered, installed, and documented correctly. It isn't permission to connect the charger to an overloaded circuit.
For a deeper look at the electrical work behind a larger service project, review home electrical panel upgrade cost. Also ask the contractor to identify any eligible incentive or credit before work begins. The federal Alternative Fuel Refueling Property Credit and utility programs can depend on site eligibility, documented installation costs, and current program rules. Don't count an incentive as guaranteed until the paperwork confirms it.
Installation Day From Mounting the Unit to Final Inspection
A competent crew should be able to explain the sequence before touching the panel. You should know where the charger will go, how the cable will be routed, what protection will be installed, and which inspection is pending.
The work sequence
Safety comes first. The electrician confirms the permitted scope, identifies the correct panel, applies appropriate lockout and safety controls, and verifies that the working area is de-energized before handling conductors.
The bracket gets real support. The charger mounts to a stud, masonry, or an approved structural backing. Drywall anchors alone are not appropriate for equipment that holds a stiff cable and connector.
The cable follows a protected route. In a garage, conductors may run as individual THHN or THWN-2 conductors in EMT conduit. NM-B may be permitted in certain protected interior locations. The electrician sizes the conductors for the approved circuit, maintains proper bend radius, secures the wiring, and protects it from impact.
Panel terminations receive careful attention. The breaker and conductors are installed according to the equipment listing and code requirements. The electrician torques terminations to specification, labels the breaker, and updates the circuit directory.
Commissioning proves the system works. The charger is energized, its self-test is run, and the electrician checks the vehicle connection. Wi-Fi pairing, scheduling, and current settings should be configured only after the electrical installation passes its basic tests.
The final inspection closes the loop. Keep the homeowner available when practical. The inspector may verify the installation against the approved plan, while the electrician can explain the breaker, disconnecting method, charger controls, and maintenance points.
For a general homeowner overview of installing an EV charger at home, focus on the planning and safety sequence, not on treating a DIY tutorial as permission to perform panel work.
If you want a licensed local contractor to manage the electrical scope, permitting, and commissioning, contact a licensed EV charger contractor in West Palm Beach. The right installer will inspect the existing service before recommending hardware.
Troubleshooting Maintenance and When to Call a Licensed Electrician
Most owner maintenance is visual and basic. Electrical repairs aren't. Check the cable and connector monthly for cracking, cuts, discoloration, or heat damage. Wipe dust from the enclosure, confirm that the connector holster latches securely, test the charger's GFCI protection according to the manufacturer's instructions, and verify that the breaker hasn't tripped.
| Symptom | Homeowner Action | Call a Licensed Electrician If |
|---|---|---|
| Charger won't power on | Confirm the vehicle is connected correctly and check whether the breaker is on | The breaker trips again, the unit stays dead, or wiring appears damaged |
| Charging is slower than expected | Check the vehicle's charging setting, schedule, and battery condition | Reduced speed continues without a vehicle-side explanation |
| Error code appears | Record the code, follow the manual's reset procedure, and restart once | The code returns after reset |
| Breaker trips | Stop charging and reset it only if the equipment shows no damage | It trips repeatedly or the panel, breaker, or cable feels warm |
| Wi-Fi connection is lost | Restart the charger and check the home network | Charging also fails, or the unit reports an electrical fault |
Stop immediately for these warning signs
Don't touch exposed wiring or keep using equipment with a burning smell, visible arcing, a warm or discolored outlet, a damaged cable, repeated breaker trips, or persistent fault codes. Those symptoms can indicate loose terminations, overheating, insulation damage, failed protection, or a circuit that doesn't match the charger's demand.
Never use an extension cord or multi-plug adapter for EV charging, and don't run the charging cable under the garage door. Keep the connector protected from standing water and physical impact. If you're also coordinating broader home electrical work, a directory that helps homeowners find standby generator installers can be useful for a separate generator project, but generator work and EV charger work still require separate load and code evaluations.
Lighthouse Energy Services can evaluate your Palm Beach County panel, complete the load calculation, install a dedicated Level 2 circuit, coordinate permitting, and troubleshoot charger faults safely. Visit Lighthouse Energy Services to request a clear installation plan before you buy equipment or approve a panel upgrade.