
You step out of a hot shower, the mirror is clouded, and the ceiling above you is already collecting beads of water. You reach for the bathroom exhaust fan switch, but nothing happens. Or the fan starts with a tired hum, rattles overhead, and moves so little air that the room stays damp.
A bathroom exhaust fan not working is more than an irritating household fault. Modern ventilation practice assumes that bathrooms have local exhaust vented outdoors, commonly at 50 CFM intermittently or 20 CFM continuously, with a typical maximum sound rating of 3.0 sones under the referenced residential guidance. California's indoor-air-quality and mechanical-ventilation requirements also specify outdoor local exhaust for bathrooms.
The useful distinction is simple: a dead fan, a weak fan, and a noisy fan need different diagnoses. Work through the symptom first, then decide whether the fix is cleaning, duct repair, electrical troubleshooting, or replacement.
Table of Contents
- Why Your Bathroom Exhaust Fan Stopped Working
- Safety First and Quick Checks Before You Open Anything
- Cleaning and Mechanical Fixes You Can Do Yourself
- Electrical Testing and When to Stop
- Choosing a Replacement Fan That Actually Fits
- When to Call a Licensed Electrician
- Preventing the Next Failure
Why Your Bathroom Exhaust Fan Stopped Working
A dead fan, a weak fan, and a noisy fan are three different faults. Their symptoms point toward different repairs, so replacing the motor should not be the first move.
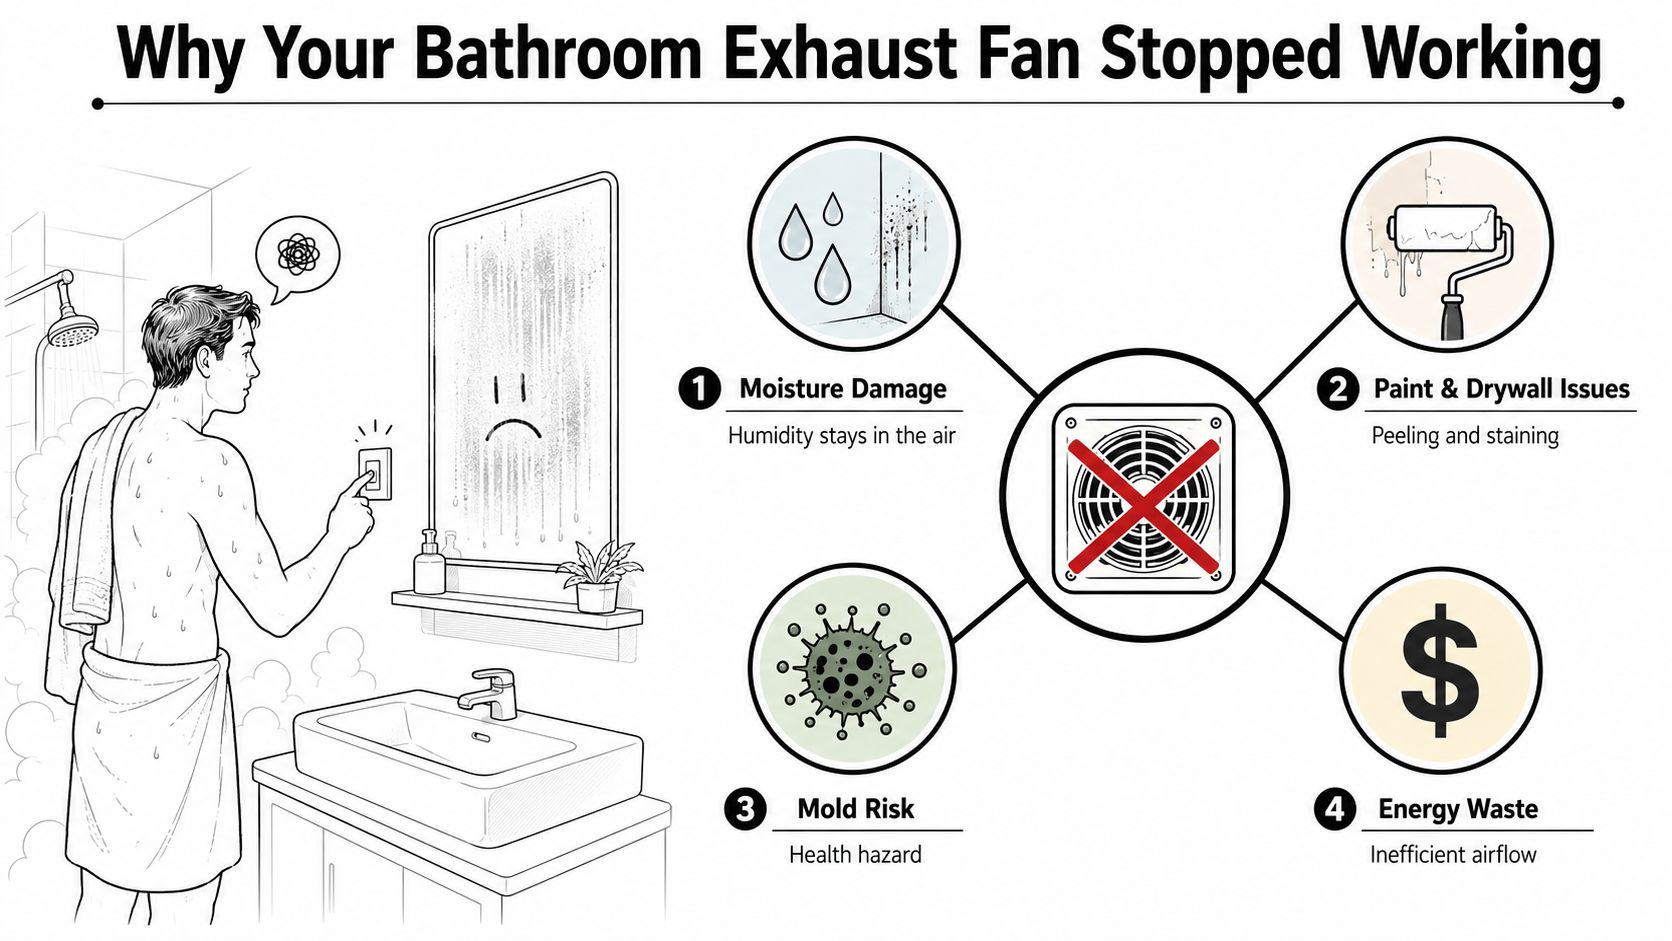
The three failure patterns
- Dead: The switch produces no sound, vibration, or airflow. Check the breaker and switch first. If those appear normal, a multimeter can confirm whether voltage reaches the fan. No voltage points to the control or wiring. Correct voltage with no motor response points more strongly to the motor or its connections.
- Weak: The motor runs, but steam lingers and a tissue barely moves at the grille. Clean the grille and impeller, then inspect the duct, damper, and exterior termination. A crushed or disconnected duct can restrict airflow even when the motor is healthy.
- Noisy: A loose grille, housing, debris, or damper can cause rattling. A growl or grinding sound suggests worn motor bearings. Tightening hardware may solve a rattle, but bearing noise usually calls for motor or fan replacement.
Residential bath fans commonly serve for 10 to 15 years, according to manufacturer maintenance guidance. Age alone does not identify the fault. Slower startup, increasing vibration, intermittent operation, a musty smell, or condensation that clears slowly are more useful warning signs.
Why delay creates a building problem
A failed fan leaves humid air on paint, drywall, trim, insulation, and concealed cavities. Persistent moisture can support mold growth and damage materials, especially when the duct is blocked or the fan vents into the ceiling space instead of outdoors. The building-maintenance guidance on bathroom mold explains why a nonworking fan deserves prompt attention.
Ventilation performance also depends on correct outdoor exhaust. California's indoor-air-quality and mechanical-ventilation requirements specify local exhaust for bathrooms.
Begin with the symptom, then inspect the matching part. Cleaning suits a weak fan caused by dirt. Duct or damper work suits restricted airflow. Electrical testing belongs after the basic checks, and a multimeter matters more than a screwdriver when the fan is dead. For broader bathroom repair planning, Modern Bathrooms Dublin 2026 offers context for coordinating ventilation work with other bathroom repairs. Stop and call a licensed electrician if voltage testing exposes damaged wiring, unfamiliar connections, or a fault inside the wall.
Safety First and Quick Checks Before You Open Anything
Begin without tools. This order prevents a homeowner from dismantling a perfectly serviceable fan when the problem is a tripped protective device or a wall switch that isn't delivering power.
Check the simple causes in order
- Operate the switch and listen. Turn the fan on and off. Listen for a hum, click, startup attempt, or faint motor vibration. Silence doesn't prove the motor is bad, but it tells you to investigate power before cleaning the impeller.
- Inspect the breaker panel. Look for a tripped breaker, including an AFCI or GFCI-protected circuit. Bathroom fans often share circuits with bathroom receptacles, so a fault elsewhere may have interrupted the fan.
- Check the control type. A timer, humidity-sensing switch, or combined light and fan control may be set incorrectly or may need cleaning. Confirm that the control is intended to start the fan under the current room conditions.
- Look through the grille. Many grilles release with spring clips or screws. With the circuit off, look for a visible obstruction, a loose duct, insulation, a nest, or a damper blade that isn't sitting correctly.
- Check the mounting. A housing that has loosened from its joist can vibrate and rattle even when the motor is healthy.
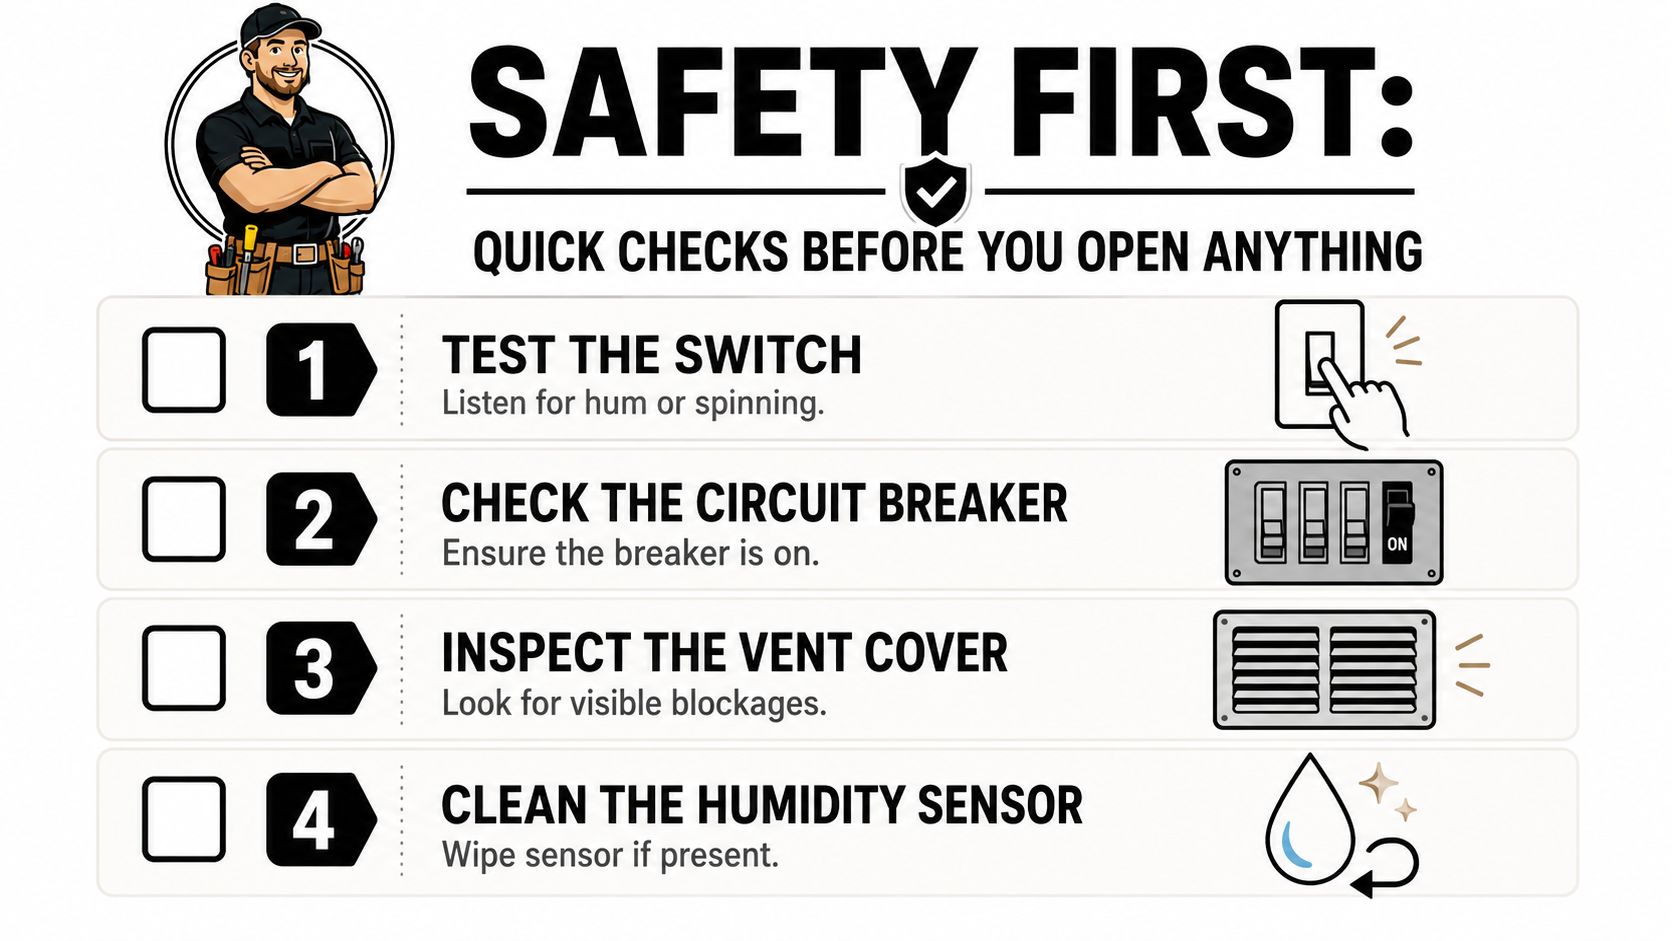
Know where homeowner work ends
Cleaning a grille and looking for a visible blockage are low-risk tasks when the power is off. Removing a wall-switch cover, opening fixed wiring, or reaching beyond a plug-in motor assembly changes the job from mechanical inspection to electrical testing.
If the fan shares protection with a receptacle, learn what that device does before resetting it repeatedly. This ground-fault circuit interrupter guide can help explain why a bathroom circuit may shut down when it detects a leakage condition.
Safety boundary: Turn off the breaker before removing the grille or motor assembly. If you can't positively identify the correct circuit, stop rather than relying on the wall switch alone.
Don't work on energized wiring while standing on a wet floor or inside a damp shower area. If the breaker trips again, you smell scorched insulation, see discoloration, or feel unsure about identifying conductors, leave the cover in place and call an electrician.
Cleaning and Mechanical Fixes You Can Do Yourself
A weak fan often needs air-path maintenance, not a new motor. Dust collects on the grille and impeller, moisture encourages debris to cling to those surfaces, and a damper can stick shut after paint or dirt accumulates around its hinge.
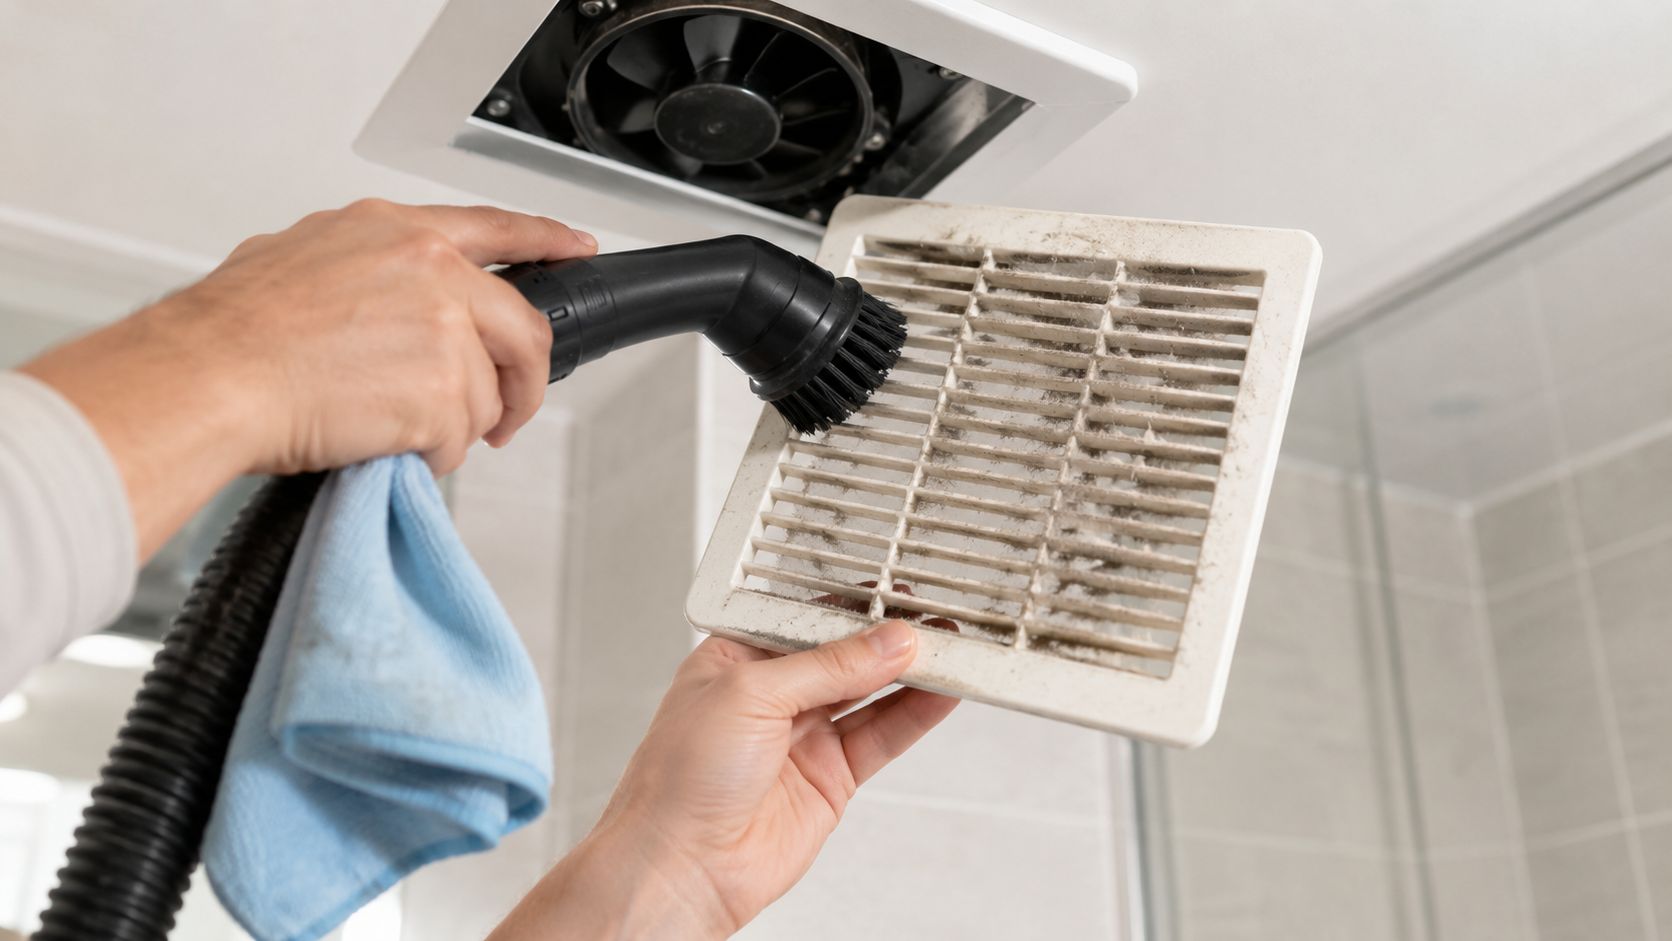
Clean from the room outward
Switch off the breaker before removing the grille. Vacuum the grille with a brush attachment, then wipe it with a damp microfiber cloth and let it dry fully before reinstalling it.
Next, inspect the fan housing. Use the vacuum brush on the impeller and surrounding housing, but hold the blades still while you clean. Spinning the motor rapidly with a vacuum can place unnecessary stress on its bearings. Don't spray water, cleaner, or lubricant into the motor.
A clicking sound often indicates a damper that is sticking. Reach only as far as the accessible duct opening and check whether the backdraft damper swings freely. Gently loosen surface debris, but don't force a blade that appears damaged or inaccessible.
Check the duct and termination
A clear grille with almost no airflow shifts suspicion toward the duct. From a safe attic location, if available, inspect for:
- Crushed flex duct: Bends and compression increase resistance and restrict discharge.
- Disconnected joints: Air may be spilling into the attic instead of leaving the building.
- Obstructions: Insulation, debris, or a nest can stop airflow.
- Damaged exterior termination: A stuck cap or blocked screen prevents the fan from exhausting outdoors.
A loose housing commonly creates a rattle that changes when you press gently against the grille. Secure mounting may solve that noise without touching the motor. A scraping sound that follows the impeller points to debris, a bent blade, or a failing bearing.
Independent troubleshooting guidance recommends measuring airflow with a flow hood, flow grid, or anemometer, because a fan can run while delivering inadequate ventilation. This bathroom exhaust fan wiring and airflow troubleshooting guide also supports separating electrical checks from airflow checks.
A tissue test is useful as a quick screen, not a performance certification. Strong suction at the grille doesn't prove that the duct is clear or that the fan meets its intended airflow.
After cleaning, you should notice stronger pull at the grille and less vibration. If the sound remains harsh or airflow stays poor, stop replacing random parts. The remaining fault may be inside the motor, in the duct design, or at the outdoor termination. SitePro Bathrooms fan installation tips provide additional installation context when the existing duct route needs correction.
Electrical Testing and When to Stop
Once the grille, impeller, damper, and duct have been checked, electrical testing can identify whether the fan is receiving power. A multimeter matters more than a screwdriver, and it's also where an inexperienced homeowner can create a shock or fire hazard.
Test voltage before testing the motor
A qualified person using an appropriate meter can begin at the wall switch. Set the meter to AC voltage, verify the meter on a known live source, and test the switch terminals according to the circuit layout. The exact reading depends on the supply and wiring configuration, so don't treat a number from an unrelated installation as universal.
The practical interpretation is:
- Voltage enters and leaves the switch when it should: The control is probably passing power. Continue toward the fan connection.
- Voltage is present at the supply side but not at the switched output: The switch, control, or its wiring may be faulty.
- No expected voltage at the switch: The upstream breaker, protective device, junction, or branch wiring needs investigation.
At the fan housing, test only if you understand how to work around energized conductors and can keep probes controlled. A confirmed supply at the fan with no motor response points toward the motor assembly, thermal protection, capacitor, or an internal connection.
Check continuity with power isolated
Turn the breaker off, verify the circuit is dead with the meter, and disconnect the motor only as the design allows. Test the motor winding for continuity using the resistance function. No continuity through the winding indicates an open motor circuit, but a continuity result alone doesn't prove that the motor is mechanically healthy.
Inspect the thermal fuse and capacitor if the unit includes them. A failed thermal fuse can interrupt the motor, while a capacitor fault may produce humming, slow startup, or failure to start. Don't bypass a thermal fuse or substitute an unverified capacitor. Match replacement parts to the fan's documentation and electrical ratings.
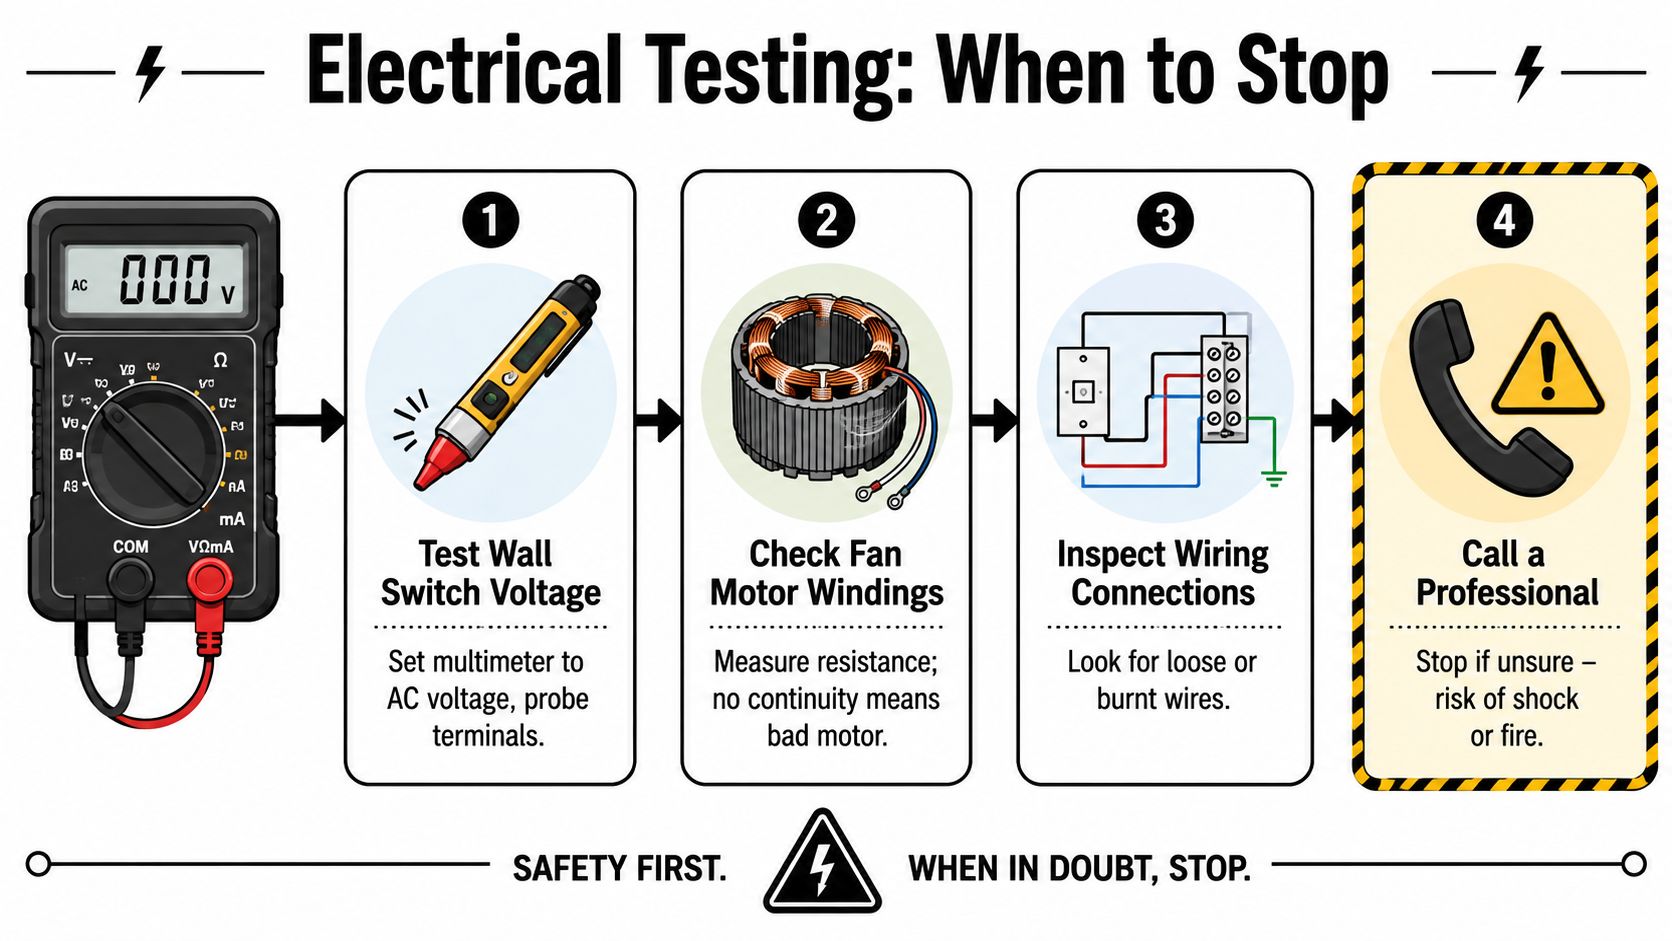
Stop at the professional thresholds
Call a licensed electrician when the fan has no voltage despite a working control, when a GFCI keeps tripping, when wiring shows heat damage, or when the branch circuit uses aluminum conductors that you can't identify and terminate correctly. New wiring for a higher-capacity fan also belongs with a professional, especially if the upgrade changes circuit loading, switching, or bathroom-zone requirements.
A motor with confirmed voltage at the housing may be a straightforward replacement if the replacement assembly is designed for the existing housing and the power is safely isolated. If the diagnosis involves unexplained voltage loss, multiple cables, hidden junctions, or damaged insulation, don't keep probing. This guide to finding a qualified electrician can help you prepare for the handoff.
Choosing a Replacement Fan That Actually Fits
A replacement fan must match more than the ceiling opening. Check the housing depth, joist space, duct diameter, exterior termination, control wiring, and required airflow before ordering. A fan that fits the hole can still fail to fit the installation.
Use room area as a starting point with the common sizing rule of 1 CFM per square foot. Adjust the choice for long or restrictive duct runs, multiple bends, and moisture-producing fixtures. A larger rating will not correct a poorly routed duct, while an oversized fan may add noise or require electrical changes.
Compare the main configurations
| Fan Type | Typical CFM | Sones | Best For |
|---|---|---|---|
| Standard ceiling mount | Varies by model | Varies by model | Ordinary bathrooms with a compatible ceiling cavity |
| Low-profile | Varies by model | Varies by model | Tight joist spaces and shallow housings |
| Combination light and fan | Varies by model | Varies by model | Bathrooms needing a combined ceiling fixture |
| Higher-capacity model | Varies by model | Varies by model | Larger rooms or bathrooms with heavier moisture loads |
Each category includes models with different airflow and noise performance. Read the tested airflow and sound rating for the specific unit, rather than relying on the category label. As noted in the earlier ventilation discussion, 3.0 sones is a typical maximum sound rating for compliant bathroom exhaust. Mounting quality and duct vibration also affect perceived noise.
Match the air path and controls
Measure the existing housing, then check the duct connection size, duct material, and termination location. Confirm whether the outlet exits through a wall or roof. An adapter may work, but it adds resistance and can create leaks when poorly fitted.
A quiet fan is not automatically weak, and a higher CFM label does not guarantee higher delivered airflow. A study of 43 bathroom exhaust fans measured actual airflow from 8% to 105% of rated output, and the published fan-performance study examines how installation resistance affects results.
Control compatibility matters as much as physical fit. Identify whether the existing switch operates only the fan, the fan and light together, a timer, or a humidity sensor. A replacement that requires a different control arrangement may need new wiring.
Before buying, compare the housing dimensions, duct route, termination, and control method. The Western Bathroom Renovations fan setup provides useful context for checking these details. If the replacement requires circuit changes or unfamiliar fixed-wiring work, stop at the product comparison and arrange a licensed inspection.
When to Call a Licensed Electrician
A dead fan, a weak fan, and a noisy fan call for different diagnoses. A dead unit may have lost power, a weak unit may have a blocked duct or failing motor, and a noisy unit may have a loose mount or worn bearing. Call an electrician when testing points to the circuit, fixed wiring, or an unsafe installation rather than the fan assembly itself.
Stop when these warning signs appear
- No power at the fan: A wall switch can feel normal while a conductor, junction, breaker, or connection has failed. A multimeter test at the fan or switch is more useful than replacing the motor by guesswork.
- Repeated GFCI trips: Repeated resets do not identify the leakage fault. Leave the circuit off and arrange testing.
- Heat or burning evidence: Discolored insulation, melted plastic, scorch marks, or a hot smell require immediate isolation and professional inspection.
- Aluminum branch wiring: Compatible terminations and repair methods depend on the wiring and connection details. Do not improvise.
- A larger fan needs new wiring: A higher-capacity replacement may require circuit or control changes beyond exchanging a motor module.
- The duct route enters a difficult area: Roof work, cramped attic access, and inaccessible terminations add fall and building-envelope risks.
In Palm Beach County, work affecting the branch circuit may involve local permit and inspection requirements. Confirm municipal rules before treating the replacement as a simple fixture swap.
Prepare useful information for the service call
A technician can diagnose faster if you provide:
- The fan manufacturer and model, if visible.
- Whether the unit is dead, weak, or noisy.
- What the breaker or GFCI did when the fault appeared.
- Whether the fan shares a switch with a light or timer.
- A clear photo of the grille, housing label, breaker, and accessible wiring. Take photos with covers in place unless a professional has made the area safe.
Service pricing depends on location, access, parts, and wiring conditions. Ask whether the quote separates the diagnostic visit, motor-only replacement, complete fan replacement, and any new wiring or duct correction.
For Palm Beach County homeowners, Lighthouse Energy Services' residential electrical repair information can help with choosing a qualified provider. The technician should explain what failed, what the repair includes, and whether permits or inspection apply before work begins. Stop using the fan if the fault involves heat, burning, exposed conductors, or repeated trips.
Preventing the Next Failure
A bath fan lasts longer when the airflow path stays clean and the control is used consistently. Run the fan during a bath or shower and leave it operating afterward long enough to clear residual humidity. If moisture remains on the ceiling or walls well after bathing, treat that as a performance warning rather than normal bathroom behavior.
Build a small maintenance routine
Monthly, vacuum the grille and watch how the fan behaves during operation. Listen for a new rattle, check whether the tissue test shows suction, and look for condensation that doesn't clear as it used to.
Quarterly, inspect the accessible damper and the exterior wall or roof termination if you can do so safely. Look for lint, debris, nests, crushed ducting, or a cap that cannot open freely. A duct can restrict airflow even when the motor sounds normal.
Every 12 to 18 months, remove the grille, clean the squirrel-cage blades, vacuum the motor housing intake, and confirm that the duct boot remains seated without kinks. Keep water away from the motor and don't force brittle plastic clips.
Indoor humidity should generally remain around 30% to 50%, with mold risk rising near 60% relative humidity, as described in the supplied mold-maintenance guidance. The EPA guide to mold, moisture, and your home also emphasizes exhausting bathroom moisture outdoors and drying damp materials promptly.
Watch for early warnings
Paint bubbling, ceiling staining, rust at the register, a musty smell, and recurring surface mold all suggest that moisture is staying in the room or entering concealed materials. If the fan becomes weak or noisy, investigate before it stops completely. If water remains on bathroom surfaces for an extended period after bathing, the fan isn't performing its moisture-control job and needs attention.
A broader review of household electrical conditions can also reveal loose connections, overloaded circuits, or protective-device issues. Use this home electrical inspection checklist as a prompt when checking the surrounding circuit or preparing for a professional inspection.
If your bathroom exhaust fan is dead, weak, or making a new mechanical noise, Lighthouse Energy Services provides residential electrical troubleshooting, repairs, and 24/7 emergency response in Palm Beach County. Visit Lighthouse Energy Services to request help diagnosing the circuit, replacing the fan, or correcting the wiring safely.